A broken air conditioner in the middle of summer is the worst.
One minute you’re fine… The next you’re sweating on the couch freaking out. What happened?! Don’t panic (or pay for an unnecessary callout) – there’s plenty you can rule out first.
If your AC is broken, use this Homeowner’s troubleshooting guide before you dial. There are only 4-5 common reasons your AC will stop working. Identify the problem and you can determine if it is a simple repair.
Let’s jump in…
Here’s what’s inside this guide:
- Why Your AC Stops Working In The First Place
- The Quick Pre-Check Before You Start Diagnosing
- The Step-By-Step Broken AC Diagnostics Checklist
- When To Stop DIY-ing And Call A Technician
Why Your AC Stops Working In The First Place
Air conditioners are workhorses. But they’re not invincible.
When it’s hottest outside, your AC will cycle more than any other season. This is when faulty parts fail. The numbers don’t lie — 47.1% of homeowners revealed their biggest fear was their AC breaking down during extreme heat.
It’s not just stress, either. Most AC failures come down to simple, fixable things:
- Dirty air filters
- Tripped breakers
- Thermostat issues
- Frozen evaporator coils
- Clogged condenser units
- Refrigerant leaks
Some problems you can fix in 5 minutes flat. Others require a technician with the proper tools.
The Good News: By knowing the difference, you save time, money and tons of aggravation.
If you’re already roasting and just need it fixed today, booking air conditioner repair same-day is by far the quickest way to cool down your home. However, if you have 20 minutes to read through this checklist first…… You may not need to schedule a tech after all.
The Quick Pre-Check Before You Start Diagnosing
Do these 3 simple tests before you start diagnosing. They are too easy to think they will help — but they eliminate many “dead” units.
Check #1: Is the thermostat set to COOL?
Seems like common sense. But if it’s been bumped to FAN or HEAT (or changed modes during a power surge), your AC will not cool your home. Make sure your thermostat is set to COOL and set 5 degrees lower than the current room temperature.
Check #2: Is the power actually on?
The indoor and outdoor units each have power switches — and they can be bumped off sometimes during cleaning or mowing. Check both.
Check #3: When did you last change the filter?
If you can’t remember the last time you cleaned your filters, you have problems. Dirty filters are by far #1 reason AC units have problems.
Got all three checked? Good. Now we can dig deeper.
The Step-By-Step Broken AC Diagnostics Checklist
Follow these steps in precisely the order given. You can’t skip steps — each assumes the simple things have been eliminated.
Step 1: Inspect The Air Filter
Remove the filter and check its transparency by holding it up to the light. If light does not pass through it — It’s full of gunk.
Dirty filters restrict airflow, freeze coils and make your system run harder than it needs to. Change it (or clean it, if it’s reusable) and wait 30 minutes for it to “catch its breath.”
If you had ice building on your AC, wait a full 1-2 hours after thawing for it to completely defrost before turning back on. Turning on a frozen AC will ruin the compressor.
Step 2: Check The Circuit Breaker
Head to your electrical panel and find the breaker labelled “AC” or “HVAC”.
If it’s tripped (in the middle position or pushed to OFF), switch it all the way OFF, then back ON. If it trips again immediately — wait. There’s a short and you need an electrician.
Step 3: Examine The Thermostat
Remove the cover from your thermostat and replace the batteries. Weak batteries are the culprit of many unsuspected AC “failures”.
While you’re there:
- Make sure the wires are still seated properly
- Check the inside isn’t full of dust
- Confirm it’s set to COOL mode
A faulty thermostat can absolutely make your whole system look broken.
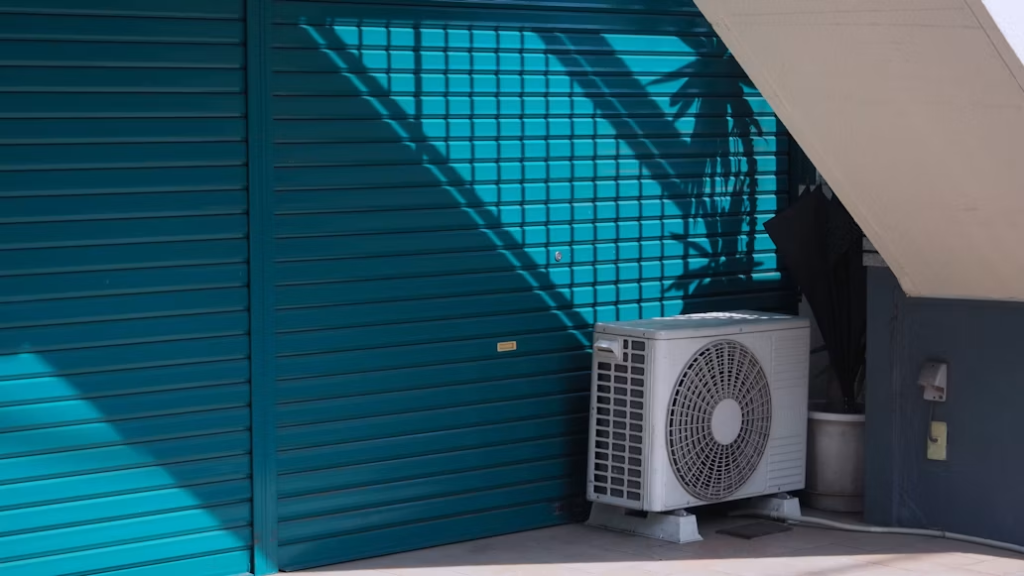
Step 4: Look At The Outdoor Condenser Unit
Go outside to your condenser (that big metal box humming away).
What you’re checking for:
- Leaves, grass, or debris blocking the fins
- The fan spinning when the AC is running
- Ice forming on the lines
- Weird vibrations or rattling
Make sure there is nothing within 2 feet of the unit. If your fan is not spinning and it is humming — that’s typically a faulty capacitor. Easy fix, but you will need a technician.
Step 5: Check Your Vents And Registers
Walk through your home and check every vent. Are they:
- Open?
- Unblocked by furniture or rugs?
- Pushing out air (even if it’s not cold)?
Closed vents = Pressure Imbalance. Blocked vents = Pressure Imbalance. No air flow whatsoever? Yep. Blower motor problem or duct leak.
Step 6: Listen For Strange Noises
Your AC should hum quietly. Anything else is a warning sign.
- Banging or clanking: Loose part in the compressor
- Squealing: Belt or motor bearing issue
- Hissing: Refrigerant leak (call a pro immediately)
- Constant clicking: Failing thermostat or control board
Record a quick voice memo of the sound prior to calling — it will allow the technician to troubleshoot more quickly.
When To Stop DIY-ing And Call A Technician
Here’s the honest truth…
Some AC issues are NOT meant for DIY. Doing so can void your warranty, cost you thousands of dollars, or seriously injure you.
Call a professional immediately if:
- The breaker keeps tripping
- You smell burning or see smoke
- There’s a hissing sound (refrigerant leak)
- Ice keeps forming after you’ve defrosted it
- The unit is over 12 years old and giving constant trouble
One more thing that people don’t realize is just how big that last one can be. If you had a unit that originally operated at 13 SEER but has degraded to 9-10 SEER after 12 years of service it could be adding $300-$600 to your power bills annually. Sometimes a repair just doesn’t make financial sense when replacing will save you money over time.
Keep in mind — the later you wait, the longer the wait list becomes during prime summer time. Take the call sooner.
Putting It All Together
Don’t fear AC repair prices will leave you bankrupt. Most problems are related to:
- A dirty filter
- A tripped breaker
- A weird thermostat setting
- A blocked condenser
- A vent issue
Go through this list before you dial someone. You’ll either repair it in 20 minutes… Or know exactly what’s wrong when you talk to tech.
That makes the repair faster, cheaper, and a lot less stressful.
Quick recap:
- Start with the thermostat, power, and filter
- Work outside to the condenser
- Listen for noises and check the vents
- Don’t push DIY past the safety line
- Call a pro the moment you see electrical or refrigerant issues
Stay cool out there.
