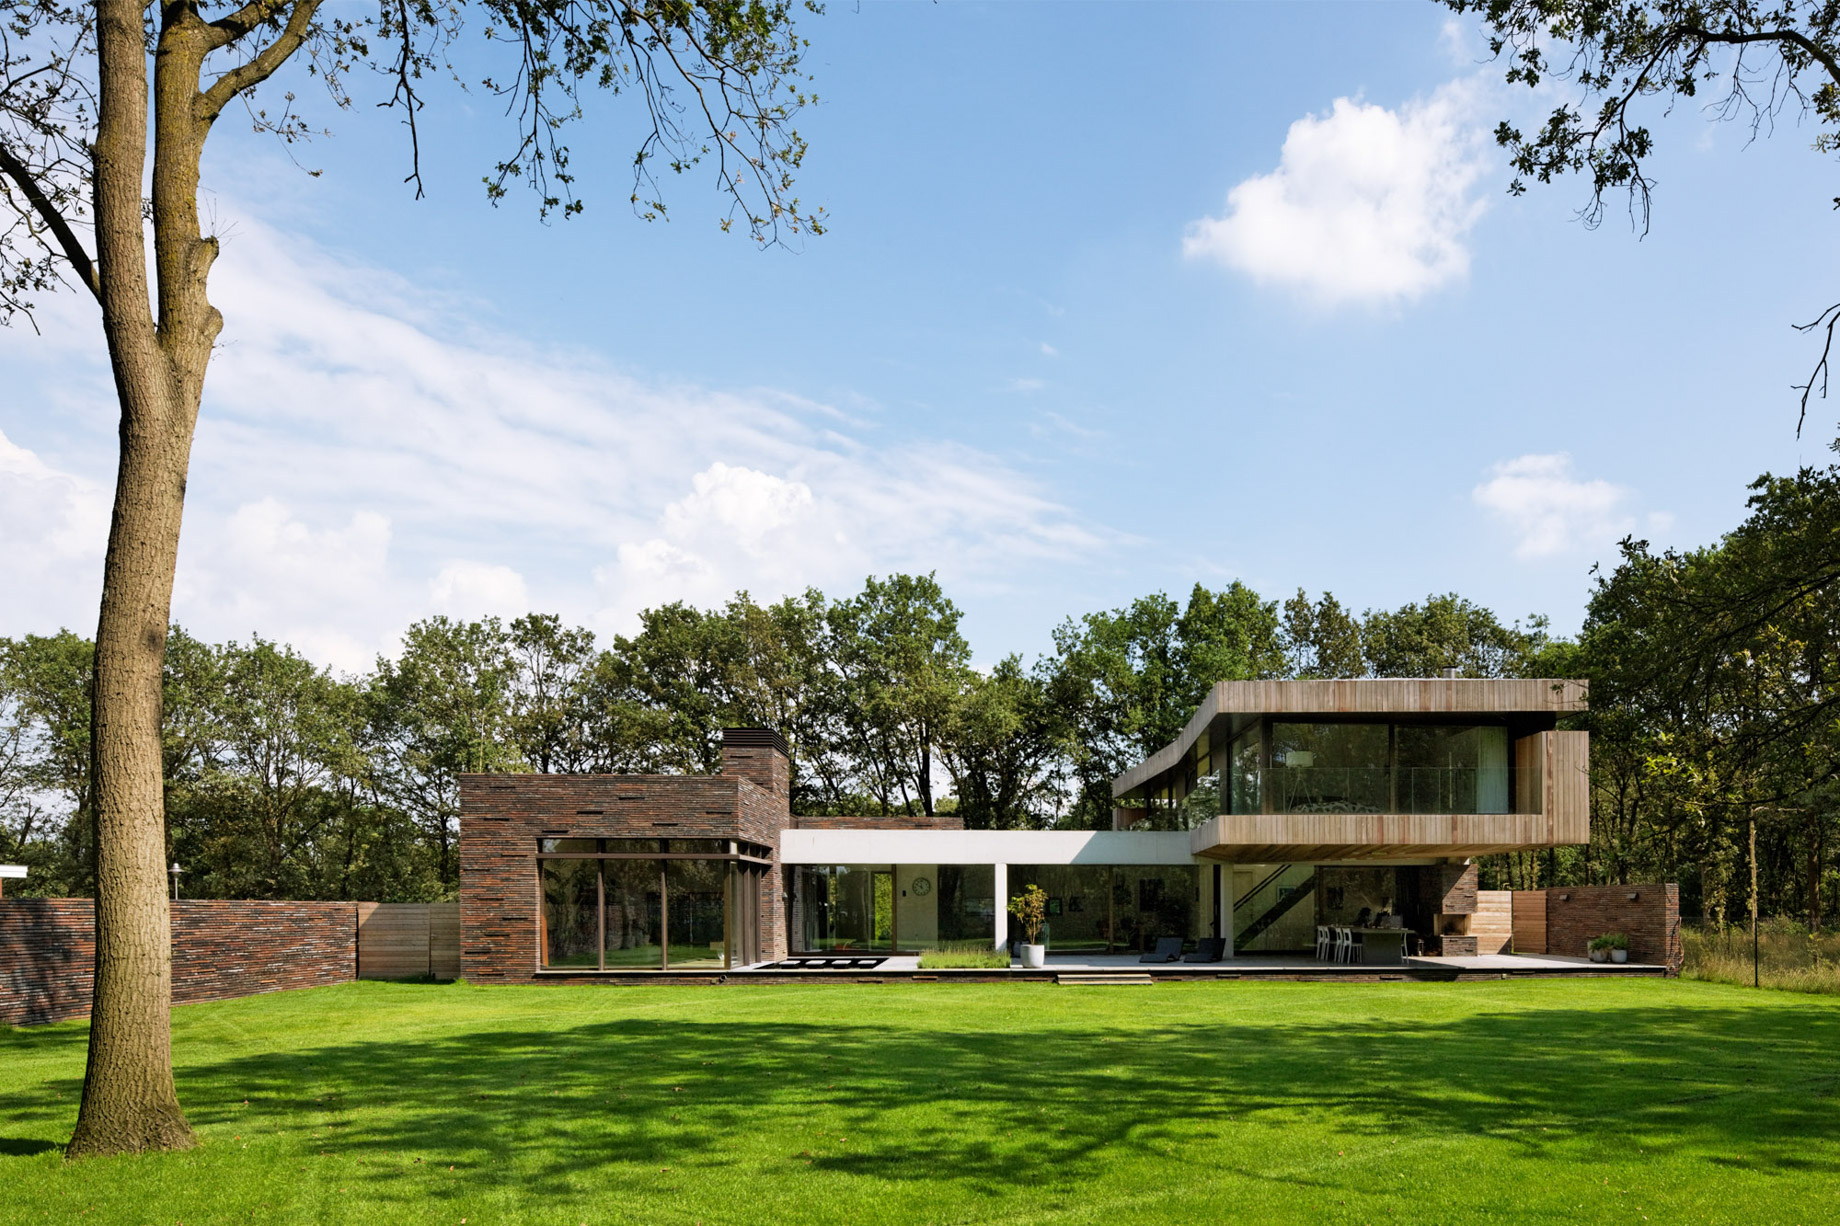
House at the Edge of a Forest, by HILBERINKBOSCH Architecten, is set on a striking lot at the forest’s edge. This home presents itself as a harmonious blend of two distinct volumes: an L-shaped base supporting a sleek, elongated structure that gracefully hovers above. The overall composition evokes the imagery of a fallen tree resting upon the earth, creating a dynamic and sculptural silhouette.
- Name: House at the Edge of a Forest
- Bedrooms: 3
- Bathrooms: 3
- Size: 3,229 sq. ft.
- Built: 2009
Perched gracefully at the edge of a serene forest, this home emerges as a striking composition of two distinct volumes: a robust L-shaped base and an oblong timber structure that seemingly balances atop it, evoking the imagery of a fallen tree resting on the earth. The house’s public-facing side, built with long, dark bricks, presents a fortress-like exterior, offering an air of seclusion and mystery. This deliberate design choice enhances the horizontal lines of the architecture, grounding the structure in its natural surroundings.
Inside, the house transforms into a sanctuary of openness and light. The living spaces flow seamlessly into the terrace, garden, and forest, with expansive windows allowing natural light to flood the interior. The garden façade, constructed of concrete, symbolizes the blend of contemporary living with the organic rampart of the surrounding environment. Above the base, a timber volume, clad in FSC-certified Louro Preto hardwood, houses the more private areas of the home. This structure, anchored by a glass volume and supported by angled steel columns, extends far beyond the base, creating shaded outdoor spaces and an uninterrupted connection between inside and out.
Every detail of the home’s design is crafted with a sculptural sensibility, where the edges dissolve into the atmosphere, reinforcing the abstraction of the form. The overhanging timber structure not only provides shelter, reminiscent of seeking refuge beneath a fallen tree, but also encapsulates the poetic journey from concept to creation. This project exemplifies a deep commitment to finding elegant solutions for complex architectural challenges, where the final structure becomes a living, meaningful part of the landscape and memory.
- Architect: HILBERINKBOSCH Architecten
- Photography: René de Wit
- Location: Venloop 17, 5384 PV Heesch, Netherlands


