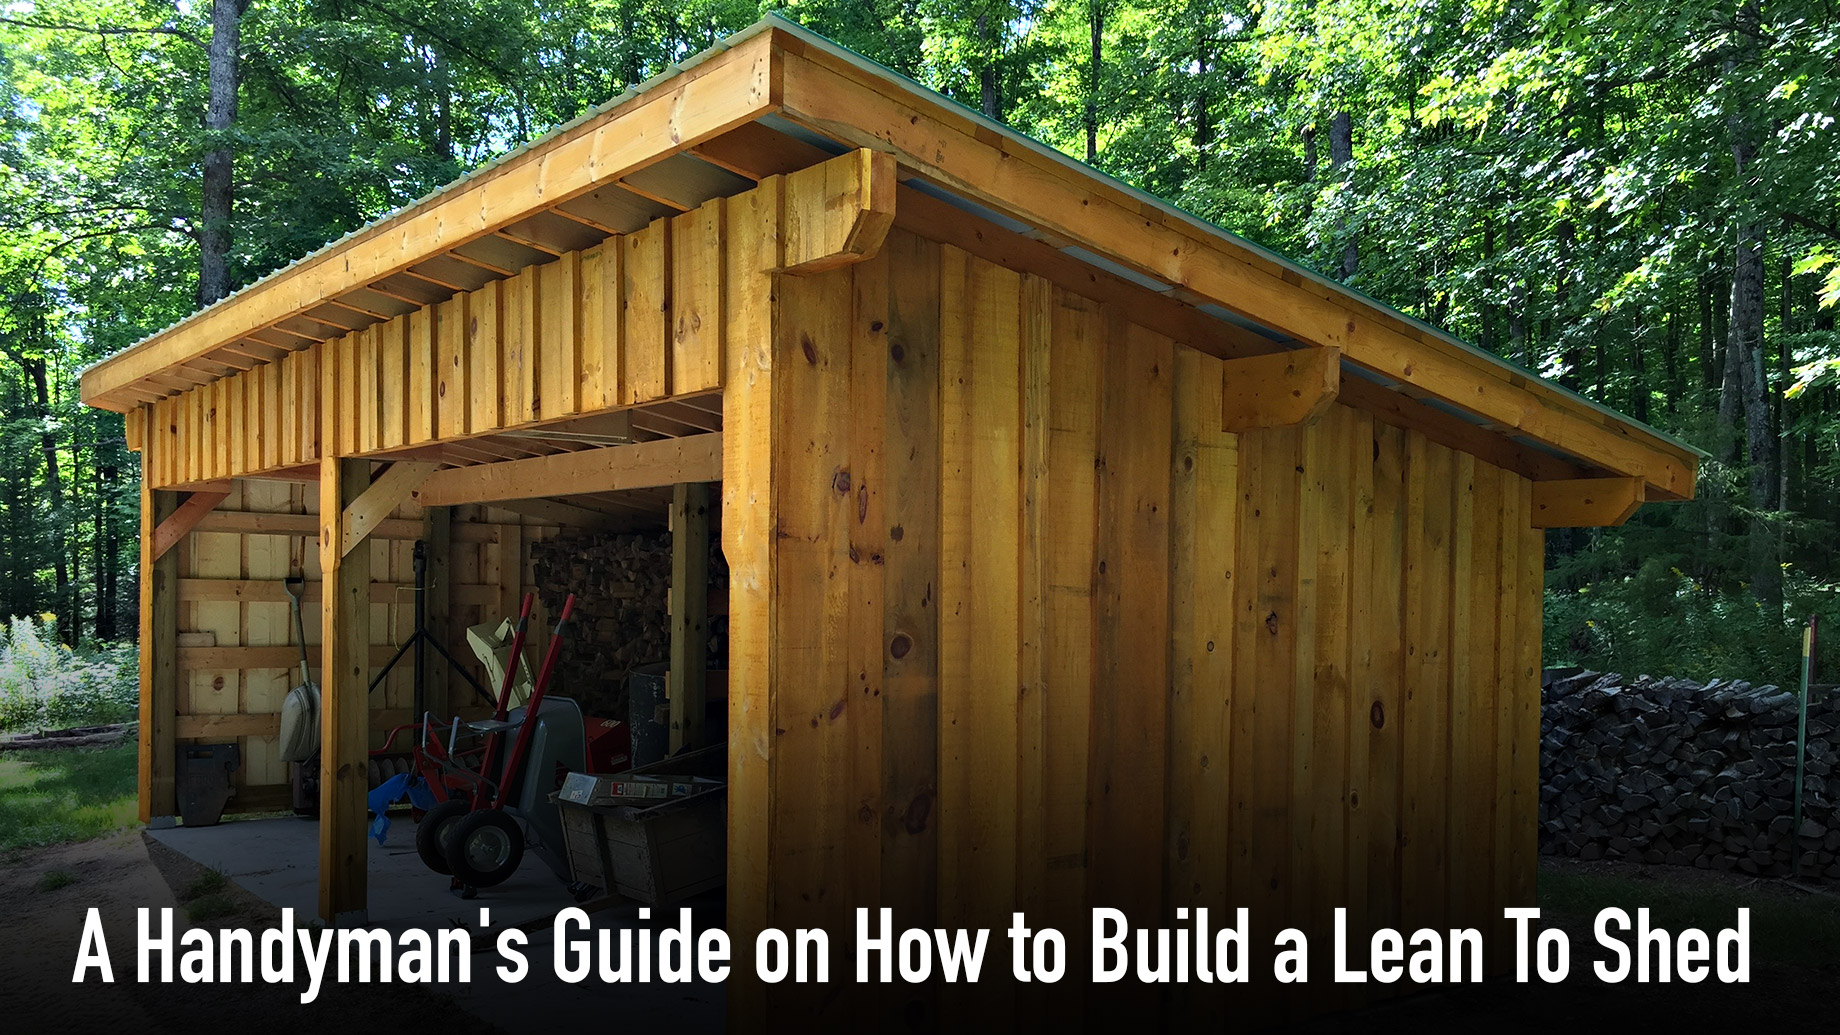
Take a look around your yard. Is the grass struggling to peek through the mountains of objects you have piled around? Does the inside of your garage look like a bomb went off? If yes, it might be time to build a lean to shed to help you store everything.
Building an outdoor shed will allow you to store power tools, garden equipment, furniture, and other miscellaneous objects out of sight. But how can you build one that’ll last? If you’re wondering how to build a lean to shed, keep reading for a guide that’ll teach you everything you need to know.
If you’re wondering how to build a lean to shed, keep reading for a guide that’ll teach you everything you need to know.
What Do You Need?
The great thing about building a shed is that you won’t need the massive list of materials that other home projects may require. However, you should plan a trip to your local hardware store.
What you’ll need depends on the lean to shed material that you decide to work with. In most cases, you’ll need different sizes of pressure-treated lumber and timber. You’ll also need screws, nails, and ties to hold everything together. Steel roofing panels and concrete mix should also be on your list.
With regard to tools, you won’t need anything too technical. Odds are that you’ll have most of the necessary ones, such as shovels and drills. If building a shed from scratch feels overwhelming, keep in mind that many companies offer lease-to-own shed options, giving you flexibility without the upfront cost.
Find the Perfect Spot
After taking stock of your materials and what you may need to buy, it’s time to find the right location to build your storage shed. Although you can build it separate from other structures, building off of your garage or barn will make it sturdier.
Look for an area that doesn’t have windows or doors that’ll get in your way. Consider making the length of your garage the length of your shed, then making it 8-feet wide with a 7-foot ceiling. This should be able to handle most of your storage needs.
The shed roof should be about a foot lower than where the roof of the other structure begins. This can help you determine the roof pitch.
Mark the Site
After you determine where you’ll build your shed, it’s time to mark the site with string on pegs. If the shed will span the length of your garage, then this should be an easy process.
After marking the area, it’s time to dig post holes. Digging around three feet in the ground should be enough. Make sure to mark where the poles will be along the string line to ensure that they are the proper distance apart from one another.
Once you dig the holes, pour a few shovels worth of concrete inside of them. Then, stick a 4×4 into each hole as the concrete begins to harden. Fill in the remaining space with dirt, then make sure that the poles are even and level.
Create the Framework
Once your poles are ready to go, you can go about constructing the rest of the shed framework.
To get started, bolt two 2×6 16-foot long boards on either side of your structure. You’ll use two of them for roof joists, and the other two for support. Attach them around two feet apart from one another.
If you can, attach the 16-foot long boards to the posts on the corner that frame your garage.
Fill in the Frames
After you’ve built the framework, it’s time to fill in the frames. Using L-brackets and nails, attach the roof joists every two feet on the structure wall. Using nails and hurricane ties, do the same thing on the other side. Make sure to attach them to the top 16-foot board.
After attaching them, move down to the second board. There, you’ll attach the roof joist supports using metal brackets and nails. To get the most out of your lumber, choose a joist support size that allows you to make two supports with a single 8-foot long board.
If you live in a place that gets a lot of snow each year, make sure to give your shed’s roof enough support. You don’t want it to collapse under the weight of heavy, wet snow.
Finish It Off
The last thing you need to do is attach the roof on top of the framework you’ve constructed.
Using a nailer, attach the roof panels to the roof joists, around two feet apart from one another. Afterward, add angle edging to the roof joists. This will help protect the joists against different types of weather.
Cover the gable parts of the roof with roofing materials. Then, add aluminum flashing between the shed roof and the structure wall.
Final Considerations
Once you finish your lean to shed, you can add onto it or spruce it up later on. If you don’t want the rugged look, consider adding different types of flooring or more permanent walls in the future.
Aside from snow, make sure to also take other types of weather into consideration. If the region you live in experiences earthquakes, high winds, or some other type of weather pattern, consider getting the appropriate framing anchors to tie it into place.
Regardless of what your final product looks like, you now have a space to store a number of different objects.
Wondering How to Build a Lean To Shed? This Guide Should Help
If you’re not the handyperson type, odds are you don’t know how to build a lean to shed. Yet by following this guide, you’ll be able to go about building a shed that’ll help you store tools and anything else you need.
Do you think you’re now ready to build a lean to shed? If you are, take a moment to first check out some of our other articles. You’ll find a number of other helpful guides and tips.