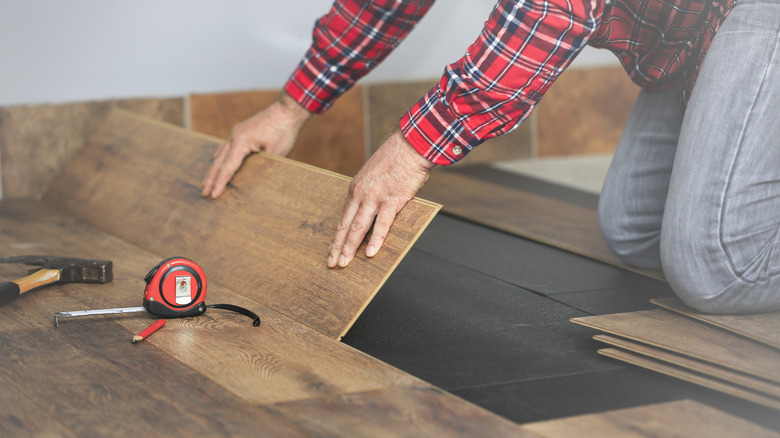
Most people treat DIY vs professional flooring as a choice between labour costs and free weekends. That calculation rarely holds once tools, delays and rework are added back in.
Price the job per square foot
A written quote can look steep because labour is shown as a separate line. It helps to price your DIY effort the same way, using the true cost per square foot. Start with materials and underlay, then add every hire charge. Once you include saw hire, extra boards for miscuts and the fuel and time needed for return trips, a DIY total that initially looked far lower often ends up much closer to the installer price. That gives you a fairer comparison.
DIY budgets often miss waste. Installers usually order spare boards because cuts around doorways and walls use more material, while DIYers tend to buy tight and then pay more for a second batch that may not match the first in shade.
Buy a little extra from the same batch where possible. Shade shifts between production runs may show in daylight.
You will need spacers and a pull bar. Many rooms also call for a fine-tooth saw and a moisture meter to check the boards and subfloor before you start, subject to the flooring manufacturer’s fitting instructions.
Don’t forget cleaning and disposal. Old flooring has to be lifted and taken away. Dust control and trim work can take hours that rarely appear in DIY estimates.
Subfloor prep decides the result
Many flooring problems begin below the visible surface. Boards that squeak or rock may not be faulty, as the cause often lies in a subfloor that was not sufficiently flat or dry when the first plank went down. DIYers naturally focus on the planks because they are visible. Installers also test what is underneath because that is what supports the finished floor.
Concrete and timber subfloors can both retain damp after leaks or long periods in an unheated or closed room. A suitable moisture meter can provide a useful reading on boards and subfloors. Depending on the product, location and base, the manufacturer’s instructions may also require a vapour barrier or another form of moisture protection to reduce the risk of wood cupping later.
Flatness can’t be judged reliably by eye. Lay a long straightedge on the deck and check for dips and humps. Small hollows that seem harmless can show through floating floors or place stress on the joints of glued boards, so filling or sanding where required may prevent cracked tongues and hollow sounds later. Skip this stage and an apparent flooring problem may really be an uneven subfloor covered with new wood.
Prep is not glamorous, but the surface generally needs to be dry and flat within the tolerances specified for the chosen flooring.
Material choice sets the risk
Skill matters, but so does the specification. Some floors are more forgiving for a first-timer, while others leave little room for error. Click-lock boards that float over underlay need no glue or nails when fitted as directed, so layout and cuts account for most of the work. A careful DIYer can achieve clean lines with patience. Material choice may therefore settle the DIY question before a saw is hired.
Solid boards tend to move more in response to heat and moisture. Engineered boards use layered cores designed to improve dimensional stability. This can give DIYers more tolerance, although correct expansion gaps, joint fitting and environmental conditions still matter.
If you want real wood with simpler fitting, engineered wood flooring in a click-lock format is often the middle ground between laminate and solid boards. It has a real timber surface and is generally more stable through temperature and humidity changes than solid wood, yet it still needs to be fitted according to the product instructions. Follow the stated acclimatisation guidance and avoid fitting the final row too tightly.
Where DIY often works
Laminate and luxury vinyl tile are often approachable DIY options. Boards or tiles are relatively light, and cuts can be straightforward with the correct sharp blade and a guide. Click-lock engineered boards may also suit DIY when rooms are square and dry, since rows can be dry-laid and joints tapped shut without the pressure of open glue time. Underlay rolls out quickly, while many click joints can be lifted and reset if a row drifts. In these conditions, a mistake may cost a board or two rather than disrupting the whole room.
Where an installer earns the fee
Nail-down solid wood and glue-down wide boards present a different challenge. Both commonly need a suitably flat deck and a steady working pace, along with the correct adhesive or nailer to keep lines true across long runs. Pattern work and large tiles can also push beyond comfortable DIY territory. A herringbone error in one corner may remain visible across the whole floor and cannot always be hidden with trim.
Room shape matters more than size
Big square rooms are kind to beginners. Small, fiddly spaces are not. A large open rectangle with two doors lets you run long rows with relatively few cuts, while an L-shaped room with a hall and three doorways forces angled cuts and short returns that consume time and boards. Use that difference as a practical test. If your plan has more doorways than long walls, budget extra hours or consider getting help.
Trim and jambs have a major effect on how clean the edges look. Skirting or scotia may need to come off and go back neatly. Door jambs need a clean undercut so boards can slide beneath, and each doorway needs an appropriate, neatly fitted transition strip.
DIYers sometimes skip jamb cuts and butt boards against the frames. That shortcut leaves shadows and gaps that collect dust and catch the eye. Sealant is unlikely to disguise the result once the floor begins to move with seasonal changes.
Curved edges and steps add another layer of difficulty. You can scribe a straight wall with a spacer block in minutes, but a curve needs repeated test cuts and more patience than many weekend schedules allow. Where rooms join, either continue the pattern accurately across the join or create a clean break with a strip.
Long runs expose a crooked start. A first row that drifts slightly will push every later joint farther off line, so string lines and wedges earn their keep before glue or click joints lock the layout in place. Check the alignment twice.
Time and tools add up fast
Installers work in days because they fit floors regularly. DIY work often spreads across weekends. Some boards need to rest in the room before installation, but the required conditions and time vary by product, so follow the manufacturer’s guidance. That wait, together with moving furniture and lifting old coverings, means the first cut may happen well after the delivery van leaves. Dry-laying the first rows can take an evening on its own, while cuts around pipes and jambs often take longer than the open floor runs.
Dust gets everywhere, even with careful sheeting. Saws need outdoor space or suitable extraction. Some adhesives require ventilation and curing time, and late tapping in flats can quickly wear thin with neighbours.
Hire windows add pressure that is absent from a fixed quote. A saw due back on Monday can force a rushed Sunday. Owning the basic tools helps, yet many DIY kits still lack a jamb saw or moisture meter, and buying them for one room rarely pays unless more rooms will follow. Borrowing can work, provided blades are fresh and meters are suitable and working correctly.
Be honest about your weekends. If free time is tight and dust and noise will strain the household, paying for speed is a practical choice rather than a luxury.
Storage matters more than many people expect. Packs left in a cold garage may not reach the conditions required for fitting. Boards stacked tightly against a damp wall can bow before you open them, so store them as directed, usually in or near the room where they will be installed and with any specified spacing between stacks.
Mistakes and warranty small print
Small slips can remain visible for years. Wood moves as temperature and humidity change, so it normally needs the expansion space stated by the manufacturer. A tight fit against walls or pipes looks neat on day one, but it may buckle or peak if the boards swell and have nowhere to move. Keep gaps consistent with the fitting guide and cover them with skirting or suitable beading. Sealant is not generally a substitute for the required movement space.
Joints reveal layout problems quickly. Butt joints that bunch together or form short, repeated stair-step patterns catch the light and may be felt underfoot. A chipped edge from a dull blade cannot always be sanded out without affecting the wear layer.
Rework costs more than getting the first installation right. Lifting glued boards can break tongues and damage the finish. Even floating floors resist correction when a row has to come up to repair a gap deep in the floor, since each joint must be released in order and every re-tap introduces another chance of a chip. One poor evening can consume an entire weekend.
Warranty terms are an important part of DIY risk. Some manufacturers ask for evidence that the boards and subfloor were tested and that installation followed their instructions, while certain products or warranties may include installer requirements. Moisture-related claims can involve detailed checks, so retain meter readings, batch information and photographs if you fit the floor yourself.
Consider the hybrid route
You don’t have to choose between doing everything yourself and handing over the entire job. Many projects split the work, with an installer handling preparation and difficult rooms while the homeowner lays the plain rectangles that suit a steady DIY pace. This directs labour spending towards the stages where experience matters most. It may also make it easier to meet product and warranty requirements for the more demanding areas.
Ask for preparation alone as a separate price. Levelling and jamb cuts may be available as day work, after which you can fit the boards at your own pace, starting from a properly prepared surface and following the specified gaps and joint layout.
Another option is to DIY the spare room first. If that goes well, you will have a clearer idea of whether the hall and lounge are within reach or better left to paid hands.
This mixed approach can save weekends and reduce frustration. You learn in a straightforward room while the main floor remains ready for a faster installer pass, leaving you to complete paint and trim at your own pace.
Get the split in writing. Agree who moves the furniture, disposes of old flooring and supplies the underlay, so the installer day isn’t lost to clearing and the DIY days aren’t delayed by missing parts.
Assess the subfloor first, then the board and room layout. When all three suit a square, dry space and the manufacturer’s instructions support DIY fitting, doing it yourself can pay. When they do not, an installer provides useful protection for both the finished floor and the structure beneath it. Choose the route that gives every stage enough time, skill and preparation.