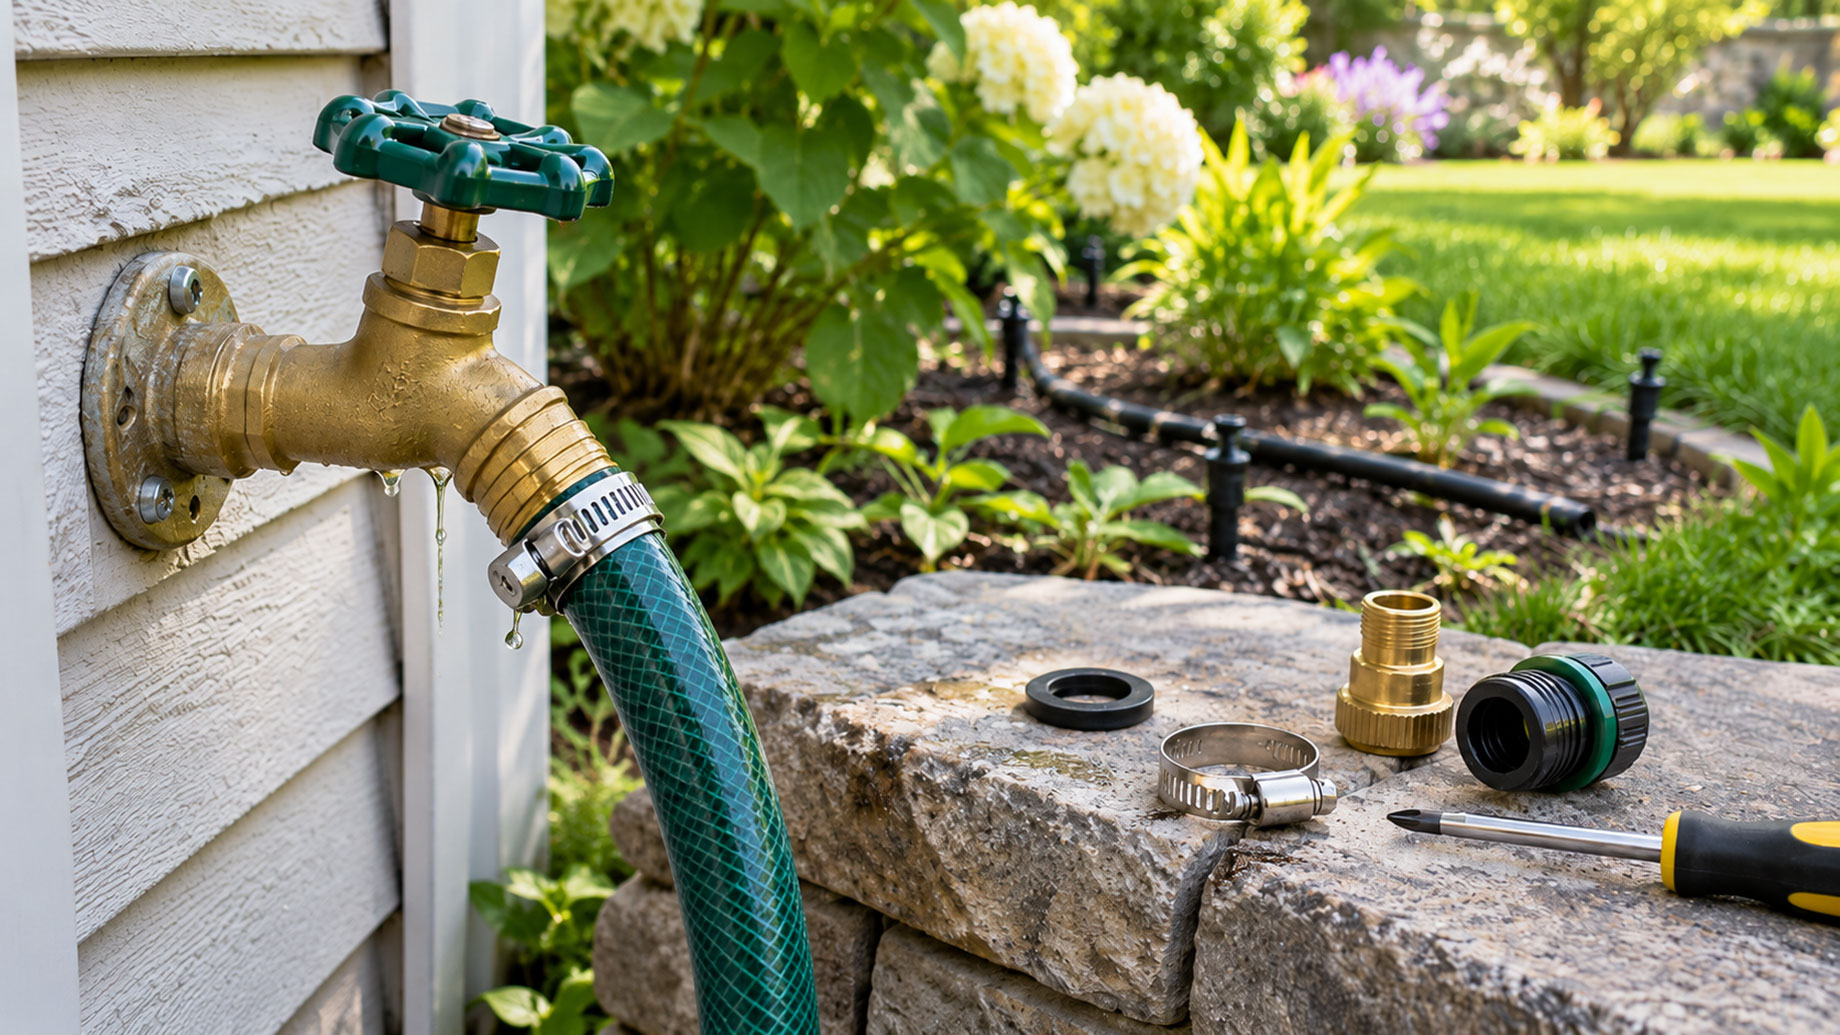
A small leak at an outdoor water connection can become expensive or disruptive if it is ignored. What begins as a damp fitting beside the house may develop into a persistent puddle, an irrigation problem, an unexpectedly high water bill, or a section of soil that never seems to dry. Underground leaks can be harder to recognize because the water may travel through the soil before appearing at the surface.
Outdoor plumbing and irrigation systems also contain far more connection points than many homeowners realize. Hose connections, valves, irrigation pipes, flexible tubing, sprinkler assemblies, drip lines, adapters, couplings, and other fittings all create places where one component meets another. Those points need to remain secure while water is moving through the system and, in many cases, while the line remains under pressure.
The U.S. Environmental Protection Agency recommends regularly inspecting irrigation systems for leaks, breaks, and damaged components. Its WaterSense guidance specifically encourages homeowners to check connections between sprinklers, pipes, hoses, and valves and notes that pooling water between irrigation cycles can be a sign of an underground leak.
Preventing these problems starts with understanding the connection rather than simply tightening whatever appears loose. The right repair depends on what is leaking, what materials are being joined, how the connection is designed to seal, and why it failed in the first place.
This guide walks through the process from diagnosis to repair and explains how homeowners can reduce the chance of repeat failures.
Find the Actual Source Before Buying Parts
Water near a fitting does not always mean that fitting is the problem.
Water can run along a pipe, follow the outside of a hose, collect under mulch, or move through loose soil before becoming visible. An underground irrigation leak may appear as an unusually green patch of grass several feet from the damaged connection.
Before taking anything apart, dry the area as much as possible and observe the connection while water is running. If the leak belongs to an irrigation system, operate the affected zone long enough to see where the water first appears.
The pattern can tell you a great deal.
A slow bead of water forming around threads points to a different problem than water spraying from a split hose. Moisture appearing where flexible tubing enters a fitting may indicate a poor tubing connection. Water emerging directly through the body of a fitting can indicate cracking or material failure.
For buried irrigation lines, look for:
- Soil that remains wet after nearby areas have dried
- Grass or plants growing unusually fast in one small area
- Water pooling while a particular irrigation zone is running
- Soil erosion around a sprinkler or valve box
- Sprinklers in the same zone suddenly losing performance
- A section of drip irrigation receiving less water than usual
- Water continuing to surface after the irrigation cycle has ended
EPA WaterSense recommends checking irrigation systems regularly for leaks, broken heads, and other problems. Pooling that remains after irrigation can be one clue that water is escaping underground.
Before buying replacement parts, confirm exactly where the water is escaping.
Know What Kind of Connection You Are Looking At
Outdoor water systems use several connection methods, and they do not all seal in the same way. Identifying the connection type helps narrow down both the likely failure and the appropriate repair.
| Connection | Common Location | How It Works | What To Inspect |
|---|---|---|---|
| Threaded fitting | Faucets, valves, adapters, irrigation equipment | Matching threads join two components | Damaged threads, cracking, incorrect sealing |
| Hose connection | Garden hoses and hose accessories | Threaded coupling and sealing washer | Worn washer, damaged threads, loose coupling |
| Barbed fitting | Flexible irrigation and drip tubing | Tubing grips a barbed insert | Incorrect tubing size, damaged tubing, incomplete insertion |
| Clamped connection | Flexible hose or compatible tubing | Clamp provides mechanical retention | Clamp size, placement, hose condition |
| Compression fitting | Compatible pipe or tubing systems | Fitting mechanically grips and seals | Incorrect sizing, damaged sealing area, poor preparation |
| Solvent joined fitting | Many PVC irrigation systems | Compatible pipe and fitting are chemically joined | Poor preparation, cracks, failed joint |
| Coupling | Pipe repairs and extensions | Joins two compatible sections | Alignment, sizing, installation quality |
Do not choose a replacement fitting simply because it looks similar to the original. Pipe and tubing dimensions, material, thread standards, fitting design, and pressure requirements all matter.
A fitting that can physically be pushed onto a tube is not automatically the correct fitting for that tube.
Start With the Simplest Example: A Leaking Garden Hose
The connection between a garden hose and an outdoor faucet is a good example of why diagnosis should come before force.
If water leaks from the threaded connection while the faucet is open, many homeowners instinctively tighten the hose harder. The problem, however, may be the sealing washer inside the hose coupling.
Turn off the water and disconnect the hose. Inspect the washer closely. A washer that is cracked, flattened, hardened, distorted, or missing may prevent the connection from sealing properly. While the hose is disconnected, check the coupling and faucet threads for visible damage.
If the washer is worn, replacing it is usually more effective than repeatedly tightening the hose.
The same principle applies throughout outdoor irrigation and water systems. A connection should seal because the right components are in good condition and assembled correctly, not because excessive force has been applied.
When Hose Clamps Are Appropriate
Flexible hoses and certain tubing connections sometimes rely on mechanical clamping to hold the material securely over or around a compatible fitting.
This is where hose clamps can be useful, but only when the connection is intended to use them.
A clamp should match the diameter and application of the hose or tubing. Placement matters as well. If the clamp sits too far from the part of the fitting it is supposed to secure, it may provide little benefit. Excessive tightening can also damage some hose or tubing materials.
Before installing a new clamp, inspect the material underneath it. If the hose is split, badly stretched, hardened, or permanently deformed, adding a tighter clamp may only delay another failure.
Work through the connection in order:
- Check the hose or tubing for damage.
- Confirm that the material matches the fitting.
- Make sure the fitting is seated correctly.
- Select a clamp that matches the required diameter range.
- Position it where the connection is designed to be secured.
- Follow any tightening or installation guidance provided by the manufacturer.
NDS Pro, for example, offers stainless steel clamps for irrigation and other water management applications. Its published product specifications show that clamp sizes are intended for defined diameter ranges, which is why selection should be based on the actual hose or tubing dimensions rather than appearance alone.
The practical point is simple: a clamp should secure a sound, compatible connection. It should not be used to compensate for damaged materials or the wrong fitting.
Repeated Leaks Can Point to a Pressure Problem
Pressure deserves closer attention when the same area keeps leaking after repair.
Water pressure that is too high can affect irrigation performance and place additional stress on system components. EPA WaterSense notes that excessive pressure can contribute to inefficient sprinkler operation and recommends appropriate pressure regulation where needed.
If one connection fails, it may simply be a damaged part. If several fittings fail in the same area or a newly repaired joint begins leaking again, look at the broader conditions.
Possible causes include:
- Excessive pressure
- Poor alignment
- Incompatible components
- Damaged pipe or tubing
- Soil movement
- Installation errors
- Physical disturbance from landscaping work
Excessive pressure can contribute to connection problems and premature wear, but it should not automatically be blamed for every leak.
Why Outdoor Connections Fail
Outdoor irrigation components operate in conditions that can change throughout the year. Some failures are caused by aging materials, while others result from movement, weather, installation problems, or damage elsewhere in the landscape.
Soil Movement
Changes in moisture, settlement, root growth, and landscape work can move buried pipe or place stress on joints. Rigid connections are especially vulnerable when the surrounding pipe is forced out of alignment.
Accidental Damage
Shallow irrigation lines are easily damaged during planting, edging, staking, or other yard work. A line may function normally for years and fail shortly after the surrounding area is disturbed.
Freezing Conditions
In areas that experience freezing temperatures, water left inside exposed or vulnerable components can contribute to cracking or other damage. Winter preparation should reflect the local climate and system design.
Sun and Weather Exposure
Aboveground hoses, tubing, and fittings are exposed to sunlight and changing temperatures. Over time, some materials can harden, weaken, or become less flexible.
Incorrect Components
A fitting that is close to the correct size may appear to work initially. Repeated operation can expose the mismatch.
Installation Problems
Poor cuts, damaged threads, contaminated sealing surfaces, incomplete insertion, and misalignment can all weaken a connection.
If the cause remains in place, a new fitting can fail for the same reason as the old one.
Use the Wet Area as a Clue, Not a Conclusion
A wet patch in the yard can help locate a problem, but water does not always surface directly above the leak.
Suppose one part of a lawn stays damp several hours after the irrigation system shuts off. A homeowner digs beneath the center of the wet spot but finds no damaged pipe.
The leak may be farther uphill or along the same irrigation line. Water escaping below ground can follow loose soil, compacted layers, trenches, or changes in elevation before appearing at the surface.
A better approach is to identify which irrigation zone serves the area and run that zone while watching for changes.
The timing can help narrow the problem:
| What You Observe | What It May Suggest |
|---|---|
| Water appears only while one zone is running | Problem may be on that zone’s lateral line, fittings, or outlets |
| Water appears while irrigation is off | Investigate a continuously pressurized line or another water source |
| Sprinklers weaken as the wet area grows | A larger leak may be reducing available pressure or flow |
| Water appears around one sprinkler | Inspect the sprinkler body and its connection |
| Water collects inside a valve box | Inspect valves and nearby fittings |
| Wet soil appears after landscape work | Physical damage to buried piping may be involved |
These are clues rather than definitive tests. Several problems can produce similar symptoms.
If the source remains difficult to locate or a continuously pressurized line may be involved, professional leak detection may be more practical than opening large areas of the yard.
Decide Whether the Connection Can Be Reused
Some outdoor connection problems can be corrected by reassembling components properly. Others call for replacement.
A useful distinction is whether the connection has loosened or whether the material itself has failed.
An intact reusable fitting that was installed incorrectly may be suitable for reinstallation if the manufacturer’s instructions allow it. A cracked fitting or badly deformed tubing should be treated differently.
Replacement is usually the better choice when you find:
- Cracked fittings
- Split or deteriorated hose
- Damaged threads
- Tubing that is permanently distorted at the connection
- Broken pipe
- Physically damaged hardware
- Components that are the wrong size or type
- A repair that has failed more than once
Avoid using adhesives, sealants, clamps, or other improvised materials to compensate for an incompatible connection.
The purpose of the repair is to restore the intended connection, not simply stop visible water for a short period.
Repairing a Buried Irrigation Line
Once a buried irrigation line has been exposed, take advantage of the access before installing the repair.
Clear enough soil away from the pipe to inspect the damaged area properly. A visible crack may extend farther than it first appears, and nearby fittings may also have been disturbed.
A careful repair usually follows this sequence.
1. Shut Off the Water
Isolate the appropriate supply and make sure the line is no longer pressurized.
2. Expose Enough Pipe to Work Properly
Dig carefully around the line instead of opening only the exact point where water first appeared.
3. Clean the Area
Remove enough mud and debris to see the pipe, fitting, and damaged surfaces clearly.
4. Identify the Failure
Determine whether the problem is a crack, puncture, separated fitting, broken joint, or movement in the surrounding line.
5. Identify the Existing Material and Size
Do this before purchasing replacement parts. Pipe that looks similar can differ in material or dimensions.
6. Remove Damaged Material
If part of the pipe needs to be replaced, cut back far enough to reach sound material on both sides.
7. Install the Correct Repair Components
Use a repair method intended for the material and connection type involved.
8. Test the Repair Before Reburying It
Restore water carefully and observe the repaired area while the system runs.
9. Restore the Soil Only After the Repair Holds
Testing while the line is still exposed can prevent a second excavation.
NDS Pro offers pipe connection products that include compression and repair couplings for specified applications. As with any repair fitting, the important issue is compatibility with the existing pipe material, dimensions, and installation requirements.
Check Alignment Before Blaming the Fitting
A connection can be made with the correct parts and still fail if the pipe is being forced into position.
Imagine two buried pipe sections that no longer line up after soil settlement. Pulling them together under tension and installing a new fitting may create a repair that is already stressed before water starts flowing.
That stress can eventually act on the fitting, the pipe, or both.
Rigid pipe in particular should not be forced sideways simply to make a connector fit. If the line has moved, the repair may need to address the alignment itself.
When the pipe or tubing sits naturally in position, the fitting is doing the job it was designed to do rather than holding the entire line under tension.
Treat Threaded Connections Carefully
Threaded outdoor fittings present a different set of risks.
Threads need to be compatible, clean, and undamaged. If a fitting begins threading at an angle or binds unusually early, stop rather than forcing it farther. Cross threading can damage both components.
Overtightening is another common mistake, especially with plastic parts.
The sealing method also depends on the connection. Some threaded joints require an appropriate thread sealing material, while others rely on a washer, gasket, or another designed sealing surface.
Do not assume every threaded connection should be sealed in the same way.
If a properly assembled threaded connection continues to leak, remove it and inspect the fitting closely. Fine cracks can be difficult to see until the part is under pressure.
Do Not Bury a New Repair Until It Passes a Full Test
A newly installed fitting should not leak at all.
If water appears during testing, shut the system down and determine why before covering the connection.
Possible causes include:
- Incorrect sizing
- Incomplete assembly
- Damaged sealing surfaces
- Debris in the connection
- Poor pipe preparation
- Misalignment
- A defective component
Allow the system to operate long enough to confirm that the connection remains dry under normal conditions.
The time to find an underground leak is while the pipe is still exposed.
Check the Rest of the Irrigation Zone Afterward
A major leak can reduce pressure or flow enough to hide other problems in the same zone.
After the repaired connection remains dry, walk through the rest of the zone while it is operating.
Look at sprinkler rise, spray patterns, drip line performance, and any other areas that were previously weak or inconsistent.
If system performance changes dramatically after the repair, that information can be useful. A restored pressure level may expose another weak fitting or damaged outlet that was less obvious while the original leak was active.
A Short Monthly Inspection Can Prevent Larger Repairs
Outdoor irrigation systems are easier to maintain when they are checked while they are working normally.
EPA WaterSense recommends periodic irrigation inspections for leaking, broken, or clogged components.
A homeowner inspection can be completed during a normal irrigation cycle:
- Walk each active zone.
- Look at visible fittings and connections.
- Watch for water bubbling from the soil.
- Check sprinkler heads for abnormal flow.
- Look inside accessible valve boxes for unexpected water.
- Inspect exposed drip tubing for separation or damage.
- Watch hardscape edges for unusual runoff.
- Return after the cycle and check for persistent wet areas.
Garden hose connections deserve occasional inspection as well. Washers, couplings, fittings, and the hose material itself all wear over time.
The most useful thing to notice is change. A fitting that begins dripping after months of normal operation deserves attention even if the amount of water seems minor.
Use the Water Meter When the Leak Is Not Obvious
Some irrigation leaks stay underground long enough that the water meter becomes the first useful clue.
EPA WaterSense recommends using the household water meter as one method for investigating suspected leaks. The basic process is to stop all intentional water use, record the meter reading, wait while no water is being used, and then check the meter again.
If the reading changes, water may be flowing somewhere in the system.
This test does not identify the location, and the property must genuinely have no expected water use during the test. Automatic irrigation, appliances, treatment equipment, and other systems can affect the reading.
Still, it can answer an important question: is water moving when it should not be?
Some utilities and household monitoring systems can also provide leak alerts based on unusual flow patterns.
If the Same Connection Fails Twice, Look Farther Out
A repeated failure should change the way the problem is investigated.
If the same connection has already been repaired once, do not assume the fitting itself is the only issue.
Check the surrounding conditions:
- Pressure: Is the system operating within appropriate limits?
- Alignment: Are the connected pipes or hoses pulling against the fitting?
- Support: Is the connection carrying weight or movement it was not intended to handle?
- Compatibility: Are the components actually designed to work together?
- Pipe condition: Is the material beside the fitting already damaged or deteriorated?
- Soil movement: Has settlement shifted the buried line?
- Installation: Was the connection assembled using the correct method?
- Recent changes: Did the failures begin after landscaping, construction, excavation, or irrigation modifications?
Recurring leaks often indicate a condition around the fitting rather than a run of bad parts.
Know When to Bring in an Irrigation Professional
Replacing a hose washer is very different from diagnosing a leaking pressurized irrigation mainline.
Professional help is worth considering when:
- The source cannot be located without major excavation
- A continuously pressurized irrigation line may be damaged
- Several fittings are failing
- Pressure problems are suspected
- Multiple valves or zones are affected
- The repair involves unfamiliar pipe materials or connection standards
- Backflow equipment or local plumbing requirements are involved
- Previous repairs have failed
- Electrical valve problems and water flow problems are occurring together
A professional can evaluate the larger system instead of treating each leak as a separate event.
That becomes especially valuable when low sprinkler performance, repeated wet areas, and recurring connection failures appear at the same time.
Before You Close Up the Repair
A final check can prevent many repeat problems.
| Question | What To Confirm |
|---|---|
| Did I locate the actual leak? | Water is escaping from the component being repaired, not from somewhere upstream |
| Are the parts compatible? | Fitting, pipe, hose, or tubing match in material and dimensions |
| Is the surrounding material sound? | No cracks, splits, damaged threads, or distorted sealing areas |
| Is the connection aligned naturally? | No excessive pulling, twisting, or bending |
| Was the correct installation method used? | Assembly follows the product requirements |
| Has the repair been tested? | Connection remains dry during normal operation |
| Did I inspect the rest of the system? | No additional leaks or unusual performance appeared |
| Can important components be reached later? | Serviceable equipment remains reasonably accessible |
Most outdoor leaks come back to a few basic issues: incompatible components, damaged materials, poor installation, excessive stress, or a problem that was never correctly diagnosed.
Homeowners do not need to become irrigation technicians to catch many of these problems early. A quick inspection while the system is operating, attention to unexplained wet areas, and careful repair practices can prevent a small connection problem from turning into a larger one.
Most outdoor leaks can be prevented by getting four things right: compatible components, proper installation, suitable operating conditions, and regular inspection. When a leak does appear, finding the cause before replacing parts usually leads to a better repair.