A flawless paint finish starts with proper wall preparation, a significant step many homeowners tend to skip. Your walls need good preparation to make the paint stick properly and last longer. Skipping this vital stage often leads to paint that chips and flakes, and repairs can get pricey later.
Time spent preparing old plaster walls or fixing flaking paint pays off by preventing future maintenance problems. Simple preparation steps help painters start their work quickly, which saves money and keeps the core team satisfied. Clean surfaces and proper repairs make a huge difference, especially when you’re painting over removed wallpaper or working with challenging old surfaces.
This piece covers everything about getting your home ready for professional painters. You’ll learn how to talk to your painting crew, clean surfaces properly, and handle the work to be done. These steps create perfect conditions for a soaring win with your painting project.
Talk to Your Painters First
A conversation, not a paintbrush, starts the best paint jobs. Professional painters in Newcastle know much more than just picking colours and applying paint. Your painting team needs to understand your expectations about project scope, prep work, and logistics before they start.
Ask what prep they expect from you
Professional painters handle most prep work, but you should know what they need from you. Time, care, and cost of a paint job mainly go into proper preparation. You should ask them about:
- Their surface preparation plans (washing, treating mould, scraping loose paint, sanding)
- Their approach to filling holes and imperfections
- Their method to seal gaps and cracks
Many quotes just say “prepare surfaces as required”, a phrase that sounds good but means nothing. Quality painters will explain their prep process because they’ve planned time for it. You should see it as a warning sign when painters dodge questions about their preparation steps.
Clarify what’s included in their quote
Clear pricing helps you understand your investment better. You need a detailed, itemised quote instead of a rough estimate. Look for a quote that breaks down:
- Labour costs and materials (including paint brands and quantities)
- Surface preparation work (sanding, patching, priming)
- Cleanup procedures after completion
- Any additional services or special circumstances
You should also check if high wall or ceiling work includes scaffolding costs. A clear understanding of included services helps you avoid surprise costs and compare quotes accurately.
Discuss access, pets, and special needs
Good logistics planning makes the painting process run smoothly. Make sure to cover:
- Their plan to reach tricky areas
- Who moves the furniture and when
- Their protection methods for floors, furniture, and landscaping
- Pet safety during painting
- Any timing restrictions you have
You should raise any concerns about ventilation, noise, or disruption to your daily routine straight away. The project will succeed when you communicate well from the start.
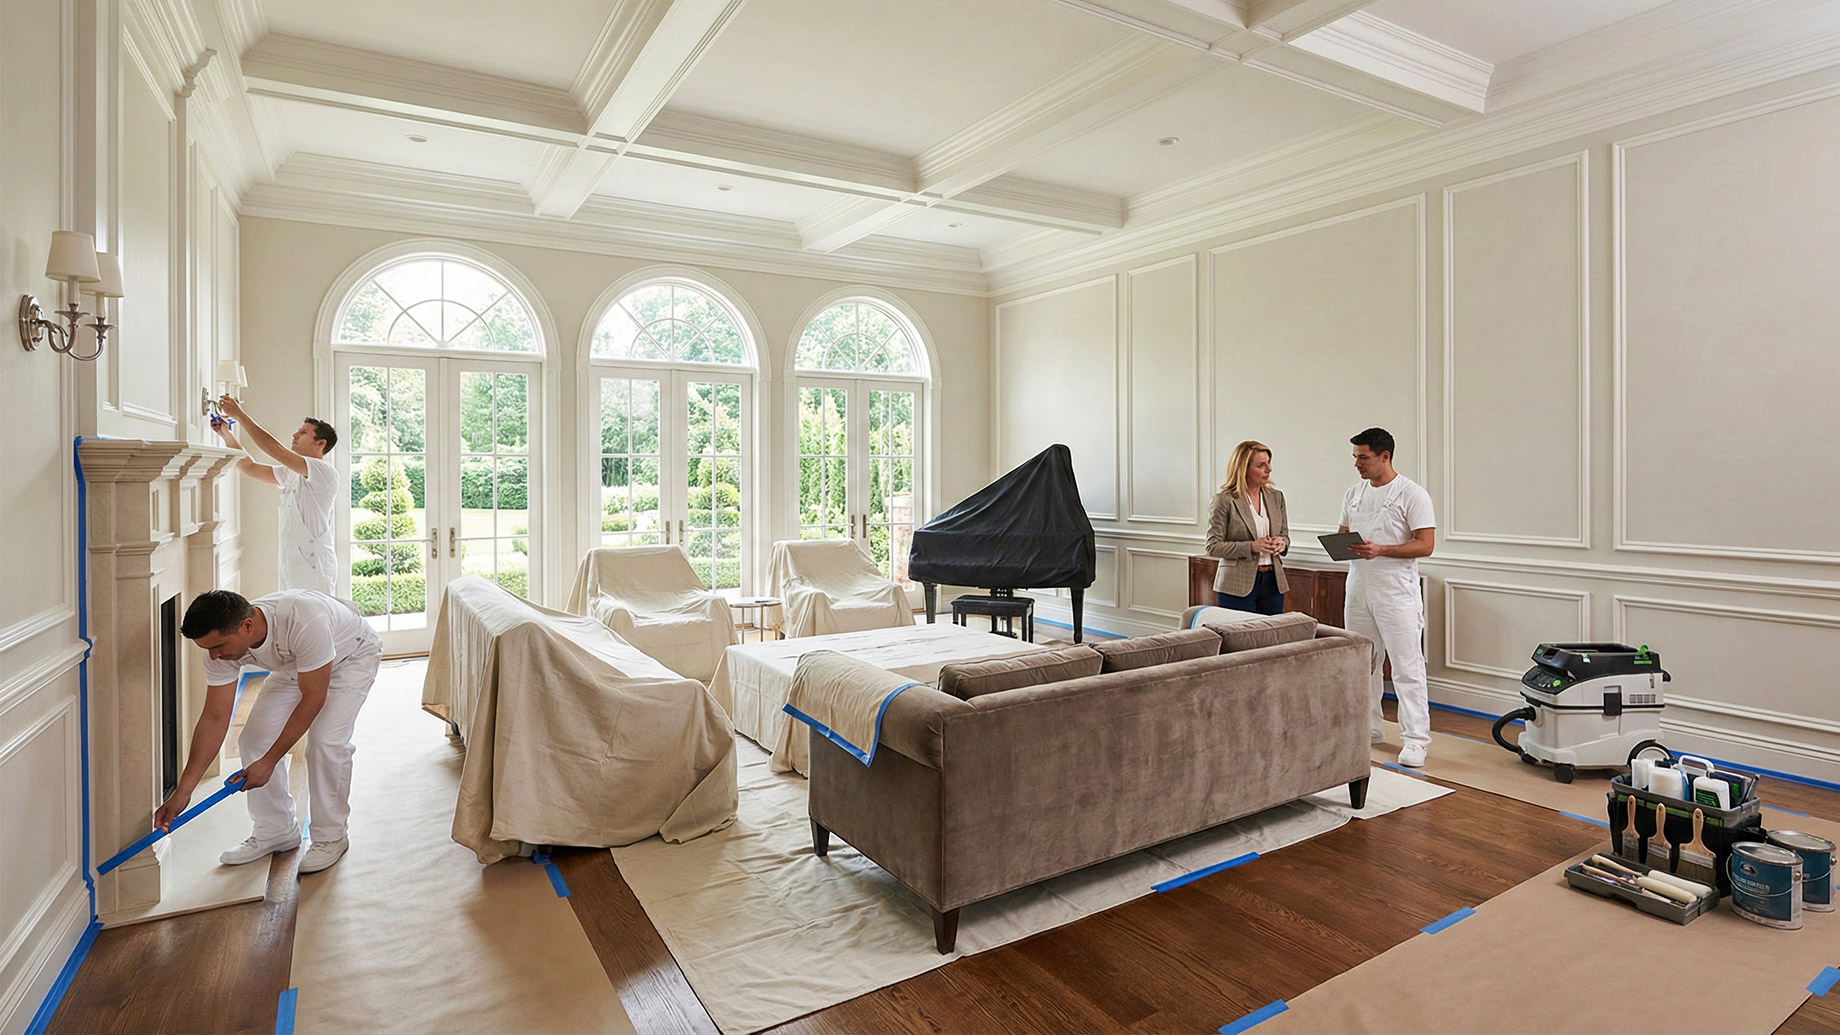
Clear and Protect the Space
Space preparation for painters often gets overlooked but remains a crucial step towards a successful painting project. Your painters need proper workspace after the original conversation, so it’s time to roll up your sleeves and get the space ready.
Move furniture to the centre or another room
Paint jobs become easier by a lot when nothing stands in the way. The best approach empties the entire room. Large pieces that won’t budge should be pulled to the room’s centre, away from the walls. Painters need a clear path to move around and reach all surfaces without obstacles. This setup also protects your valuable items from accidental paint splatters.
Take down wall hangings and window treatments
In stark contrast to this, keeping paintings and mirrors on walls doesn’t save time, it makes the job harder. Wall hangings need to come down along with window treatments like curtains and blinds. Painters can then cover surfaces evenly without cutting around obstacles. These items should stay safe in another room or closet throughout the painting process.
Unplug electronics and secure cords
Electronics need extra care during paint jobs. The process starts with unplugging devices and removing outlet covers and switch plates. A zippered storage bag works great for keeping screws attached to their covers with clear tape. TV mounting brackets and wall-mounted electronics might stay put, but they need careful coverage to avoid dust buildup.
Cover floors and furniture with drop cloths
Protection matters for items staying in the room. The drop cloth market stands at $2 billion in 2024, offering several options:
- Canvas drop cloths: These durable, absorbent, and reusable cloths work great for serious projects
- Plastic sheeting: A lightweight, budget-friendly option perfect for large furniture
- Butyl drop cloths: These come with rubber coating and non-slip features
Plastic sheeting with masking tape protects furniture well. Floors need heavy-duty drop cloths with plastic backing to stop paint from seeping through. The cloth should be bigger than your work area for complete protection.
Clean and Repair Surfaces
Surface preparation is the foundation of every successful paint job. Clear your space first, then you can focus on the walls.
Dust and wash walls, skirting boards, and trims
Start by removing dust and cobwebs with a soft cloth or dusting brush. Get a bucket of warm water ready with cleaning solution. Work from top to bottom and gently wipe all surfaces to remove dirt and grime. This significant step will give a proper paint adhesion to the surfaces.
Use sugar soap or vinegar for greasy areas
Sugar soap works great at cutting through grease and general household dirt. Mix it as directed on the package, usually 1/2 cup in a 10-litre bucket of water. A vinegar solution tackles stubborn spots well, especially when you have kitchen grease. Test any cleaning solution on a hidden spot first and protect your skin with gloves while using sugar soap.
Patch holes and cracks in walls
Check for damage after the walls are clean and dry. Use spackling compound or filler with a putty knife for nail holes and small cracks, slightly overfilling each spot. Larger holes might need mesh tape as reinforcement before you apply compound. Deep holes need filler in layers, let each layer dry according to the manufacturer’s guide.
Sand rough spots and flaking paint
Sand all patched areas with medium-grit sandpaper (120-grit) once repairs are fully dry to create a smooth surface. Remove loose material from flaking paint areas with a scraper, then sand edges to blend them into the surrounding wall. Wipe down all surfaces with a damp cloth to remove sanding dust before moving forward.
Tips for preparing old plaster walls for painting
Old plaster needs extra care. Look for structural problems, hairline cracks show normal settling, but bigger cracks might point to deeper issues. Apply a penetrating primer on crumbling spots to stabilise the surface. Old plaster responds better to gentle cleaning methods, so avoid too much moisture that could harm delicate surfaces. The right preparation of old plaster walls helps paint stick better and creates a beautiful finish that lasts.
Final Day Checklist
Getting ready for your painters is a significant part of the process. These final preparations will help your professional painters work faster and create amazing results.
Vacuum and wipe down surfaces again
Dust doesn’t take long to settle back. A quick final vacuum of floors and surface wipe-down will catch any settled dust, especially in edges and corners. This step matters even more if you’ve been sanding because it helps paint stick better without weird textures.
Remove switch plates and outlet covers
Your painters might do this task, but taking off outlet covers and switch plates yourself shows you care about the job. You’ll just need to unscrew two screws for each plate. You could clean these covers with warm soapy water while they’re off, or toss them in the dishwasher to make them look new. Professional painters will paint behind these covers to give a perfect finish.
Ensure proper ventilation
Good airflow isn’t optional, it’s a vital part of the process. Windows should stay wide open for 2-3 days during and after painting when weather allows. Bad weather outside? Set up fans to create cross-ventilation by putting one to push air out and another to pull fresh air in. This setup keeps you safe and lets paint dry the right way.
Secure pets in a safe area
Wet paint and pets don’t mix well. Keep your furry family members in another room or find them a temporary home during the painting. This protects both your pets and your fresh paint job.
Set up a space for painters’ tools and cleanup
Pick a corner where painters can keep their equipment. On top of that, it helps to provide:
- A clear path from the entrance to work areas
- Access to power outlets and water
- A designated bathroom
- Bottles of water for the painting team
Conclusion
A thoughtful plan and careful work make your home ready for professional painters. We’ve outlined steps that separate average paint jobs from exceptional ones. Good preparation helps paint stick better and last longer, which saves you money down the road.
Clear communication forms the foundation of any successful painting project. Speaking openly with painters about expectations creates clarity that helps everyone. On top of that, a properly cleared space lets painters work quickly and get better results.
Surface preparation needs the most attention without doubt. Paint looks best on clean, smooth walls without dust, grease, or damage. This step might feel tedious, but it determines how professional your final results will look.
Your final touches the day before painters arrive matter just as much. These last preparations help the project start smoothly without delays or complications.
Professional painters bring expertise and skill to your project, but you play a vital role in setting them up to succeed. Your preparation efforts affect both the quality and life of the finished work. A well-prepared home lets painters focus on their specialty, creating beautiful, lasting colours that you’ll enjoy for years ahead.