Copper pipes are durable and widely used for water supply lines, but over time, they can develop leaks at joints or seams.
If you discover a leaking copper pipe, you might not want to deal with the hassle of soldering, especially if you don’t have the right tools or experience.
Luckily, there are several ways to fix a leaking copper pipe without soldering and join copper pipes without soldering.
Here are some simple and effective methods to help you repair and connect copper pipes without the need for a torch or soldering skills.
Why Choose to Fix Copper Pipes Without Soldering?
There are several reasons why you might want to repair or connect copper pipes without soldering:
- No specialized tools required: Soldering requires a torch, flux, and solder, which may not be available or necessary for small repairs.
- Faster repairs: If you’re in a hurry, non-soldering methods can be much quicker and easier.
- No experience needed: You don’t have to worry about potentially making mistakes with a torch and solder.
- Temporary or permanent fix: Depending on the method, you can either temporarily patch a leak or make a more permanent solution.
Now, let’s dive into the different methods to fix a leaky copper pipe joint and join two copper pipes without soldering.
1. Using a Pipe Repair Clamp or Coupling
A pipe repair clamp or coupling is one of the quickest and easiest ways to stop a leak in a copper pipe. This method doesn’t require any specialized skills or tools. Here’s how to use a pipe repair clamp:
Materials Needed:
- Pipe repair clamp or rubber gasket coupling
- Wrench or screwdriver (if applicable)
- Pipe cleaner or sandpaper
Steps:
- Shut off the water supply: Before you start any repair, make sure to turn off the water supply to the affected pipe.
- Clean the pipe: Use a pipe cleaner or sandpaper to remove any dirt, corrosion, or oxidation around the leaking area of the copper pipe. This ensures a tight seal when you apply the repair clamp.
- Place the clamp over the leak: For a pipe repair clamp, position the clamp around the leaking section of the copper pipe. If using a coupling, slide the coupling over both ends of the copper pipe, ensuring that the rubber gasket is seated correctly.
- Tighten the clamp or coupling: Using a wrench or screwdriver, tighten the clamp or coupling until it is secure. Be careful not to overtighten, as it can damage the pipe.
- Turn the water back on: Check for leaks and ensure that the repair is holding firm.
2. Using Epoxy Putty or Pipe Sealant
For a temporary or permanent fix, epoxy putty or pipe sealant can work wonders. This method is perfect for small leaks, cracks, or holes in copper pipes.
Materials Needed:
- Epoxy putty or pipe sealant
- Pipe cleaner or sandpaper
Steps:
- Turn off the water supply: Always begin by shutting off the water to the affected pipe.
- Clean the pipe: Use a pipe cleaner or sandpaper to clean the area around the leak. This will ensure that the epoxy bonds properly to the surface of the copper pipe.
- Mix and apply the epoxy: Follow the instructions on the epoxy putty or pipe sealant. Mix the two parts of the epoxy (if necessary) and apply it to the leaking section of the copper pipe. Make sure to cover the leak completely and spread it evenly.
- Allow the epoxy to cure: Let the epoxy cure for the amount of time specified in the instructions. Depending on the type of epoxy, this could take anywhere from a few minutes to several hours.
- Turn the water back on: After the epoxy has fully cured, turn the water back on and check for leaks. The epoxy should form a strong bond and prevent any further leaking.
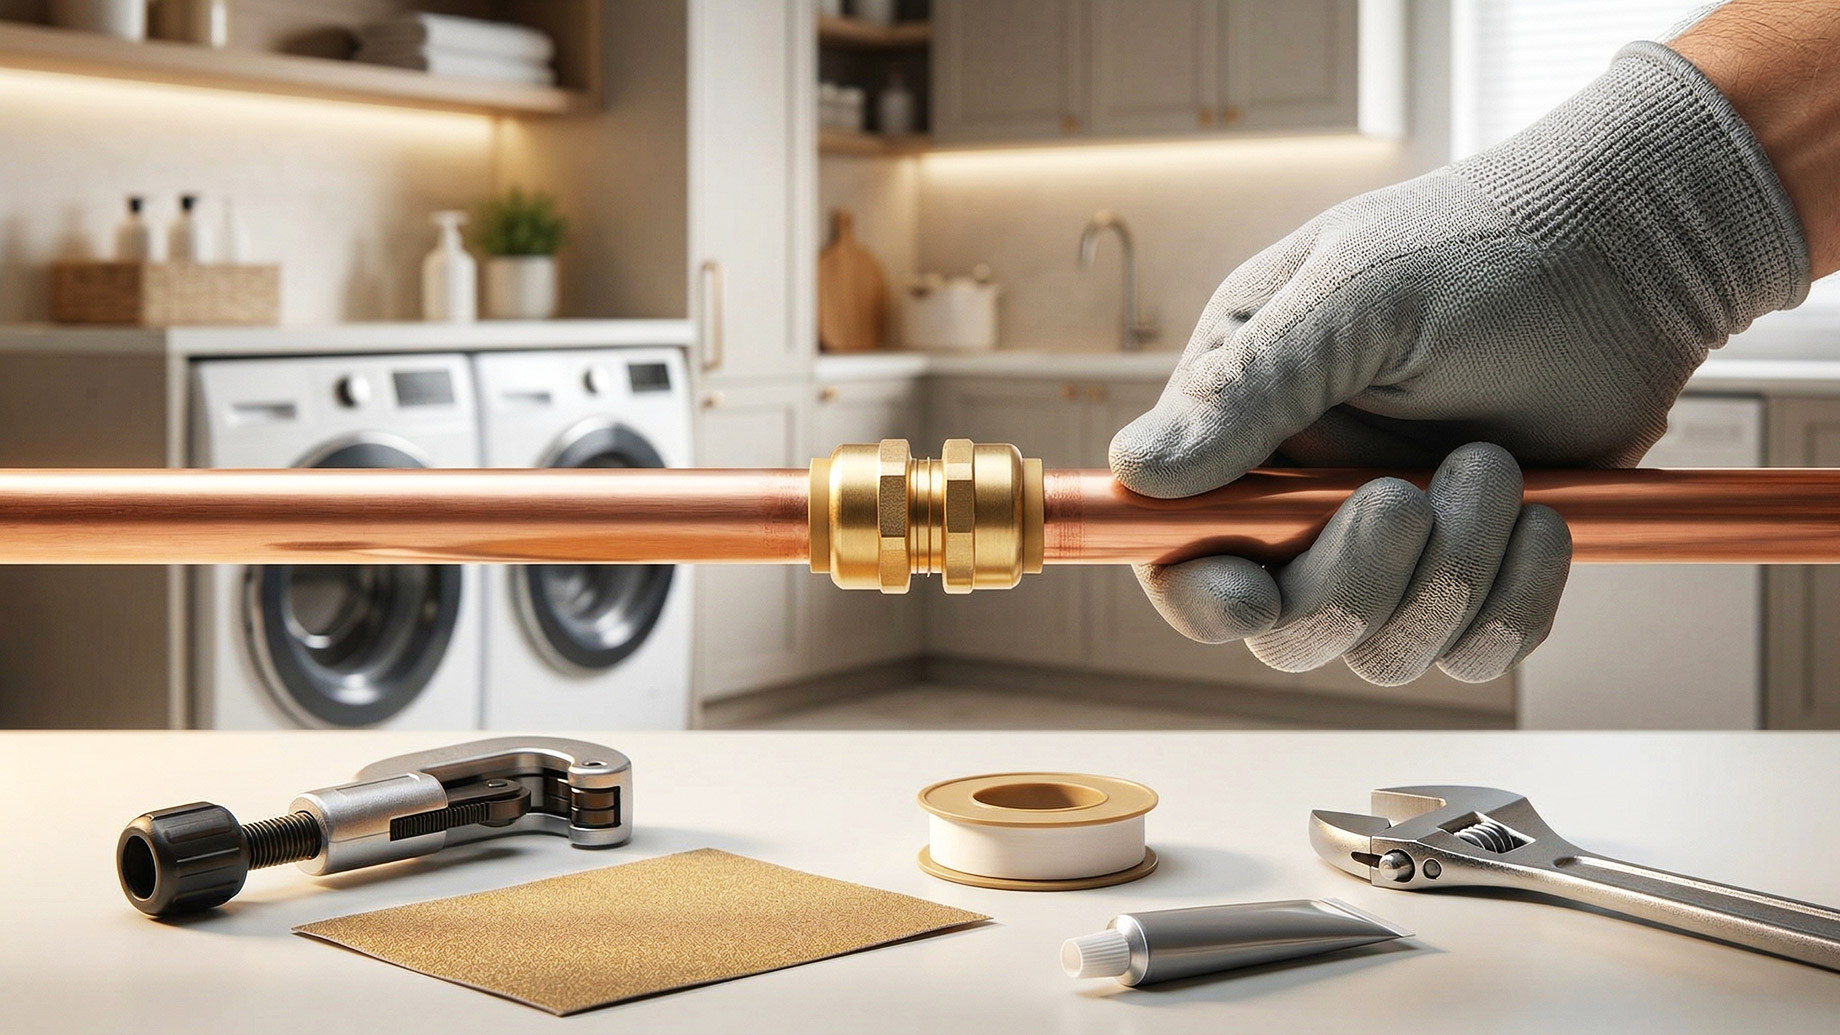
3. Using Compression Fittings
Compression fittings are a great way to join two copper pipes without soldering, especially if you’re replacing a damaged section or adding a new pipe. Compression fittings create a secure, watertight seal by using a ferrule (a metal ring) and nut to compress the pipe.
Materials Needed:
- Compression fitting kit
- Pipe cutter (if needed)
- Wrench
Steps:
- Turn off the water supply: Always start by turning off the water supply to avoid making a mess during the repair process.
- Cut the pipe (if necessary): If you’re replacing a section of pipe, use a pipe cutter to cut the copper pipe to the desired length. Make sure the edges are clean and smooth.
- Install the compression fitting: Slide the compression nut and ferrule (the metal ring) onto each end of the copper pipe. Then, insert the pipes into the compression fitting, ensuring that they are fully seated inside the fitting.
- Tighten the nut: Use a wrench to tighten the compression nut. This will compress the ferrule against the pipe, creating a tight seal. Be sure not to overtighten, as it could damage the pipe.
- Check for leaks: Once the fitting is tightened, turn the water back on and check for leaks. The compression fitting should hold securely without any water seepage.
4. Using Push-to-Connect Fittings
Push-to-connect fittings (also called quick-connect fittings) are a popular and easy way to connect copper pipes without soldering. These fittings use internal O-rings to create a watertight seal, and the pipes simply push into place.
Materials Needed:
- Push-to-connect fittings (sized for your copper pipes)
Steps:
- Turn off the water supply: Ensure that no water is flowing through the pipe.
- Prepare the pipes: Clean the ends of the copper pipes to remove any dirt or corrosion. Use a pipe cutter to ensure that the ends are clean and square.
- Push the pipes into the fitting: Simply insert the clean ends of the copper pipes into the push-to-connect fitting. You should feel a slight resistance as the O-rings inside the fitting seal the pipes.
- Test the connection: Once both pipes are securely connected, turn the water supply back on and check for leaks. Push-to-connect fittings provide a secure, leak-free connection.
5. Using SharkBite Fittings (Push-to-Connect)
SharkBite fittings are another great option for connecting copper pipes without soldering. These fittings are easy to use and work well for both repair and installation.
Materials Needed:
- SharkBite fittings
- Pipe cutter (if necessary)
Steps:
- Turn off the water: Ensure the water supply is shut off to avoid leaks.
- Prepare the pipe: Clean and cut the copper pipe if necessary. Make sure the ends are smooth and free of debris.
- Insert the pipe into the SharkBite fitting: Simply push the copper pipe into the SharkBite fitting until you hear it click. This ensures that the fitting has securely gripped the pipe.
- Check for leaks: Turn the water back on and check for leaks. SharkBite fittings are designed to provide a strong, leak-free seal.
Fixing and Joining Copper Pipes Without Soldering
Fixing a leaky copper pipe or joining two copper pipes without soldering doesn’t have to be complicated.
Using methods like compression fittings, push-to-connect fittings, epoxy putty, and repair clamps can help you fix leaks or connect pipes quickly and effectively.
Whether you’re looking for a temporary fix or a permanent solution, these methods offer simple, reliable ways to solve your plumbing issues without the need for soldering.
Always remember to turn off your water supply before starting any plumbing repair, and test your connections once the work is done to ensure there are no leaks.
If you’re unsure about any repair, it’s always a good idea to consult with a professional plumbing and home services.