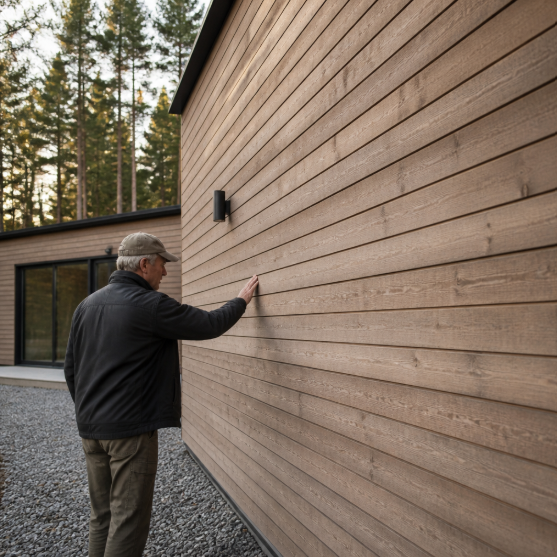
Cedar is one of the few exterior materials that rewards patience. A well-detailed cedar facade can be re-coated, selectively repaired and left alone for long stretches, while a poorly detailed one starts cupping and bleeding tannin within a couple of seasons. The difference almost never comes down to the species. It comes down to grade, grain orientation, moisture content at install, fastener choice and the handful of millimetres of air behind the board.
If you are planning a renovation on a high-value property, or specifying cladding for a new build, the decisions below are the ones that determine whether cedar becomes a thirty-year asset or a maintenance liability.
Shingles, shakes or siding: three different buildings
These three products are often discussed interchangeably, which is how clients end up disappointed. They behave differently because they are made differently.
Sawn shingles
Shingles are sawn on both faces, which gives you a smooth, tapered unit and tight, disciplined coursework. On a shingle-style house or a coastal cottage, sawn shingles produce the fine-grained, almost woven texture that reads as traditional. Because the faces are sawn flat, they also accept stain and bleaching oil evenly, which matters enormously if the client wants a controlled silver-grey rather than a patchy one.
Split shakes
Shakes are split rather than sawn, at least on the exposed face, so they are thicker, rougher and far more sculptural. Shadow lines are deeper, the surface is lively, and the material forgives slightly less precise framing. The trade-off is that the irregular face holds more water and more coating, so expect heavier initial absorption and more variation in weathering.
Pattern and bevel siding
Horizontal bevel, channel rustic, shiplap, tongue-and-groove and board-and-batten each carry a distinct architectural accent. Pattern siding is milled to a profile, so the joinery does part of the weather management for you, and long runs give a crisp, modern read. It is also the most sensitive to movement: wide boards shrink more across the grain, so width, grain orientation and installed moisture content need to be considered together rather than one at a time.
Grade and grain matter more than the brochure photo
Two cedar boards from the same tree can perform very differently depending on how they were cut. Vertical grain, or quartersawn, material has growth rings running roughly perpendicular to the face. It moves less, cups less and holds a coating far longer than flat grain. Flat-sawn stock is usually more affordable and has the dramatic cathedral figure some designers want, but it is more prone to raised grain and surface checking on sun-exposed elevations.
Clear material, free of knots, is the standard choice for painted or stained siding where a uniform surface is the point. Knotty grades are legitimate and often desirable on rustic or mountain-modern exteriors, but knots are resin-rich and can bleed through light-coloured coatings unless primed appropriately. Decide which look you want before you decide on a finish system, not after.
Thickness is the quiet variable. Thicker shingles and shakes resist curl, hold fasteners more securely and cast better shadows. On exposed elevations and anywhere with wind-driven rain, the extra thickness tends to pay for itself in fewer replacements.
Installation details that decide the lifespan
Most cedar failures are installation failures. A short, unglamorous checklist prevents the majority of them.
- Acclimatise before you nail. Cedar delivered wet and fastened immediately will shrink in place, opening joints and pulling at fasteners. Store it flat, off the ground, covered but ventilated, and let it reach something close to local equilibrium.
- Back-prime or back-coat everything. Sealing only the face creates an imbalance in moisture exchange and encourages cupping. All six surfaces, including field cuts, should be treated.
- Create a drainage gap. A rainscreen cavity, formed with battens or a drainage mat, lets the back of the cladding dry. On tight, well-insulated assemblies this is no longer optional thinking; it is the main reason modern cedar outlasts older installations.
- Use stainless fasteners. Cedar’s natural extractives corrode plain or lightly coated steel, and the result is black streaking down an otherwise perfect wall. Hot-dipped galvanised is a minimum; stainless is the safe answer, particularly near salt air.
- One nail line, not two. Blind-nail or single-nail bevel courses so each board can move. Pinning both edges guarantees splits.
- Respect ground and roof clearances. Keep the bottom course well clear of grade, decks and roof surfaces, and flash every horizontal transition. Capillary action is relentless.
Exposure also deserves a decision rather than a default. Reducing the weather exposure on shingle courses increases the number of layers over any given point on the wall, which improves weather resistance at the cost of more material and labour. On a windward gable, that trade is usually worth making.
Finish now, or plan to weather
There are three honest paths. Leave cedar unfinished and accept that it will move toward grey unevenly, lighter where rain washes it and darker where it stays damp. Apply a bleaching oil or weathering stain to steer that greying so it arrives sooner and more uniformly. Or use a pigmented semi-transparent or solid stain, which protects the surface from ultraviolet breakdown and requires periodic re-coating on a schedule the owner needs to understand up front.
Film-forming paints can work beautifully on vertical-grain clear siding over a proper rainscreen, but they are the least forgiving choice because any trapped moisture shows up as peeling. Before committing a client to a finish, it is worth reading through the technical guidance and frequently asked questions published by the Cedar Shake and Shingle Bureau, which addresses coating, exposure and application questions in practical terms.
Sourcing: where the project is won or lost
Cedar is a graded, milled, species-specific product, and a generic order placed through a general lumber channel often arrives as a compromise: mixed grain, inconsistent thickness, the wrong profile for the architectural intent. Working with a supplier that specialises in cedar species and custom wood products changes the conversation, because you can discuss grade, grain orientation, pattern profile and millwork details before anything is cut. Liberty Cedar is one example of that kind of specialist, supplying cedar shingles and shakes, pattern siding, timbers, white cedar and Atlantic white cedar, mouldings and custom millwork, along with western red cedar lumber for residential and commercial exteriors, which means a single material package can carry a consistent species and finish from the field siding through to the trim and the exposed timber brackets.
Coordinating cedar with the rest of the envelope
Siding rarely gets replaced in isolation. Roof edges, gutters, flashings and window openings all terminate into the cladding plane, and those junctions are where water actually gets in. Sequencing matters: head flashings installed after the siding, or windows set without sill pans, undo good cedar work. Many homeowners find it simpler to address these systems together, and the case for a coordinated approach is made clearly in this look at how a regional firm handles roofing, siding and window upgrades as a single property transformation rather than three separate jobs.
Timbers follow the same logic. Exposed brackets, outriggers, pergolas and porch posts are the elements people photograph, and they take the harshest exposure. Specify generous overhangs, chamfer or slope the end grain where you can, keep end cuts off horizontal surfaces, and treat every cut face. Large sections will check as they season; that is normal behaviour in solid timber, not a defect, and clients are far happier when told so in advance.
A short pre-order checklist
- Confirm the look first: sawn shingle, split shake or milled pattern, and clear versus knotty.
- Specify grain orientation and thickness for each elevation, not for the whole house at once.
- Decide the finish system and whether the supplier or the site will apply the first coats.
- Design the rainscreen cavity and flashing details before ordering quantities.
- Specify stainless fasteners and the exposure for each course run.
- Order matched trim, mouldings and timbers from the same species and source for colour consistency.
- Hand the owner a written maintenance expectation: wash cycle, inspection points, re-coat interval.
Cedar is not a low-decision material, and that is precisely why it still appears on the best houses. Get the grade, the gap and the fasteners right, and the wall will spend the next two decades quietly improving rather than slowly failing.